
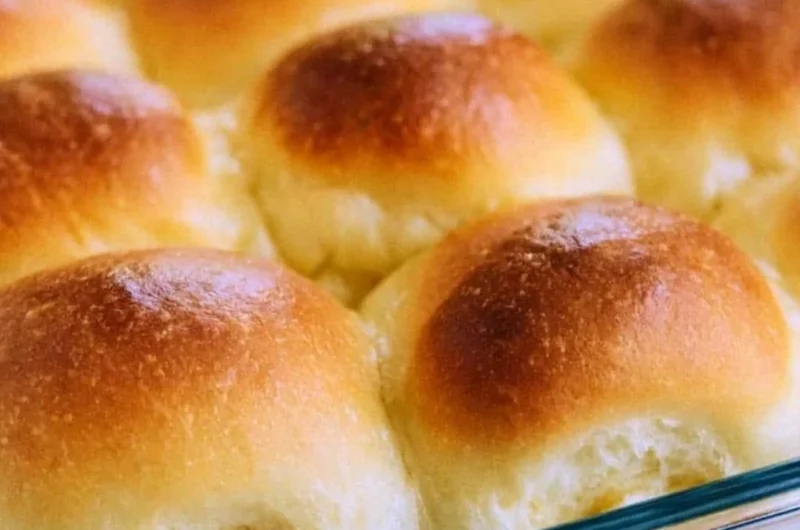
Warm and Comforting Old Fashioned Yeast Rolls
There’s something truly magical about the aroma of fresh-baked bread wafting through the house, especially on a chilly day. As children, my siblings and I would often gather around our cozy kitchen table, eagerly awaiting the moment our mom would pull those golden-brown, pillowy yeast rolls from the oven. Each roll was like a warm hug on a plate, perfectly soft and slathered in generous pats of butter. Those memories wrap around my heart like the dough itself — warm, comforting, and utterly nostalgic.
Today, I’m thrilled to share my recipe for Warm and Comforting Old Fashioned Yeast Rolls. These rolls are not just a side dish; they’re an invitation to linger at the table, a reminder of family gatherings and hearty meals shared. With just a few simple ingredients, you’ll be whisked away to that cozy place of nostalgia. This is one you’ll definitely want to pin for later!
Why You’ll Love This Recipe
- Easy Homemade Bread: There’s nothing quite like the satisfaction of making bread from scratch. These rolls are beginner-friendly and require only a bit of patience.
- Perfect for Any Occasion: Whether it’s a holiday feast, a cozy winter dinner, or a weeknight meal, these rolls always steal the spotlight.
- Soften the Hardest Days: The mere act of breaking open a golden roll and watching the steam escape can uplift your spirits and create a sense of comfort.
- Customizable to Your Taste: From sweet to savory, you can tweak these rolls to fit your cravings or your family’s favorites.
- Freezable for Later: Make a double batch and enjoy your rolls anytime by pulling them out of the freezer whenever you need a warm, comforting treat.
What You’ll Need
Gather these simple ingredients to create your own warm and comforting rolls:
- 2 1/4 teaspoons active dry yeast
- 1/4 cup warm water
- 1/4 cup granulated sugar
- 1/2 cup milk, warmed
- 1/3 cup unsalted butter, melted
- 1 teaspoon salt
- 1 large egg
- 3 to 4 cups all-purpose flour
How to Make Warm and Comforting Old Fashioned Yeast Rolls
Let’s make it together! Follow these simple steps to bring warmth and joy into your home:
- In a small bowl, dissolve the yeast in warm water with a pinch of sugar. Let it sit for about 5-10 minutes until frothy.
- In a large mixing bowl, combine the warm milk, melted butter, sugar, and salt. Mix well.
- Add the egg and the frothy yeast mixture to the bowl, mixing to combine all the ingredients.
- Gradually add flour, one cup at a time, mixing until a soft dough forms.
- Knead the dough on a floured surface for about 5-10 minutes until it becomes smooth and elastic.
- Place the dough in a greased bowl, cover it with a clean cloth, and let it rise in a warm place until doubled in size, about 1 hour.
- Punch down the dough and shape it into rolls. Place the rolls in a greased baking dish.
- Cover and let them rise again until doubled, about 30 minutes.
- Preheat the oven to 375°F (190°C).
- Bake for 15-20 minutes or until the rolls are golden brown.
- Brush with melted butter before serving.
Delicious Variations to Try
While these rolls are delightful as they are, there’s always room for creativity in your kitchen! Here are a few fun ideas to customize your rolls:
- Herbed Garlic Rolls: Add minced garlic and chopped fresh herbs to the butter for an aromatic twist. Imagine the fragrant garlic filling your kitchen!
- Cinnamon Sugar Rolls: Sprinkle cinnamon and sugar onto the rolled-out dough before shaping. The sweet aroma will have everyone rushing to the table!
- Cheesy Pull-Apart Rolls: Fold in shredded cheese like cheddar or mozzarella to the dough for a rich, indulgent treat.
- Fruit and Nut Infusion: For a delightful sweet touch, mix in dried cranberries or chopped nuts, adding texture and flavor to the rolls.
Chef Emma’s Helpful Tips
To ensure your rolls turn out perfectly every time, here are my best kitchen secrets:
- Make-ahead Option: You can prepare the dough, let it rise, punch it down, and shape the rolls. Then, cover and refrigerate them overnight. Just bring them to room temperature and let them rise again before baking.
- Flour Gradually: Adding flour a little at a time helps you achieve the perfect dough consistency. You want it soft but not too sticky.
- Yeast Proofing: Always check your yeast before starting — it should become frothy. If not, consider using a fresh packet.
- Storage Tip: Store any leftover rolls in an airtight container at room temperature for up to two days. They can also be frozen for up to a month. Just reheat them in a warm oven to regain that cozy softness.
What’s Inside – Nutrition Breakdown
Here’s a quick overview of the nutrition information per serving (1 roll):
- Calories: 150
- Carbohydrates: 24g
- Sugar: 5g
- Fat: 5g
- Protein: 3g
- Sodium: 120mg
Frequently Asked Questions
Can I make this ahead?
Absolutely! Prepare the dough and store it in the refrigerator overnight for easy baking the next day.
Can I use different ingredients?
Yes! Feel free to substitute with whole wheat flour for a nuttier flavor or use alternative milks if needed.
How do I store leftovers?
Store any leftover rolls in an airtight container at room temperature or freeze them for later enjoyment.
How long does it last?
When stored properly, these rolls will last up to two days at room temperature or a month in the freezer.
A Cozy Closing Note
As the aroma of baking rolls fills your home, you’ll find yourself reminiscing about cozy family gatherings and the warmth of shared meals. This recipe for Warm and Comforting Old Fashioned Yeast Rolls is not just about the food; it’s about creating moments and memories around the table.
Save this delightful recipe to your cozy comfort food Pinterest board so that you have it ready whenever you crave that familiar feeling of home. Let’s come together and make these golden rolls a staple in our kitchens!


