
Black Forest Icebox Cake: A Sweet Slice of Nostalgia
There’s something irresistibly cozy about a dessert that harks back to cherished memories. I still remember the warmth of my grandmother’s kitchen, the sweet aroma of chocolate wafting through the air while she expertly layered her famous icebox cake. It was a celebration of flavors—rich and decadent, with the burst of cherries and fluffy whipped cream that left us grinning at each other with delight.
This Black Forest Icebox Cake is my modern twist on that beloved classic. It combines the crunch of Chocolate Oreo cookies and the creamy texture of a luscious filling that is simply unforgettable. Perfect for any gathering, be it a summer barbecue or a cozy holiday get-together, this easy no-bake dessert will wrap you in a warm hug of familiar flavors. You’ll want to pin this for later because trust me, it’s a recipe you’ll find yourself coming back to time and time again!
Why You’ll Love This Recipe
- No-Bake Delight: Making this Black Forest Icebox Cake is a breeze; no oven required!
- Quick and Easy: In just a little while, your dessert will be ready to chill in the fridge.
- Crowd-Pleasing: Its creamy, dreamy layers are sure to impress family and friends at any gathering.
- Customizable: You can play around with flavors and toppings, making it a versatile dessert.
- Perfect for Any Occasion: Be it birthdays, holidays, or just a weeknight treat, this dessert fits the bill!
Gather These Simple Ingredients
To create this delicious Black Forest Icebox Cake, you’ll need the following ingredients:
- 24 Chocolate Oreo cookies
- 8 oz Cream cheese, softened
- 1 cup Cherries, pitted and chopped
- 2 cups Whipped cream
- 1/2 cup Sugar
- 1 teaspoon Vanilla extract
Let’s Make It Together
Creating this masterpiece is as simple as layering flavors and textures. Follow these cozy steps to make your very own Black Forest Icebox Cake:
- In a bowl, mix the softened cream cheese with the sugar and vanilla extract until it’s smooth and creamy like a soft cloud.
- Gently fold in the chopped cherries, letting their juicy goodness blend beautifully with the cream cheese mixture.
- In a large serving dish, layer the Chocolate Oreo cookies at the bottom to create a delightful crunch.
- Spread a generous layer of your cream cheese cherry mixture evenly over the cookies, bringing sweet richness to each layer.
- Add a lovely layer of whipped cream on top, making it fluffy and inviting.
- Repeat the layers until you reach the top of your dish, finishing with a hearty dollop of whipped cream. Sprinkle extra cherries on top for that beautiful pop of color.
- Refrigerate for several hours or preferably overnight, allowing the flavors to mingle and the cake to set.
Fun Ways to Customize It
Do you want to add your personal touch? Here are some delicious variations to try with your Black Forest Icebox Cake:
- Zesty Lemon Twist: Substitute half of the cherries with zesty lemon curd for a bright, tangy contrast to the rich chocolate.
- Rich Chocolate Ganache: Drizzle a warm, velvety chocolate ganache over the whipped cream for an indulgent treat that will make chocolate lovers swoon.
- Nutty Addition: Add chopped nuts between the layers for an extra crunch that pairs beautifully with the creaminess of the cake.
- Berry Medley: Swap out the cherries for a mixture of seasonal berries like strawberries and raspberries for a fruity explosion.
Chef Emma’s Helpful Tips
- Make-Ahead Magic: This dessert tastes even better the next day, making it perfect for prepping ahead of time.
- Easy Slicing: Before serving, run your knife under warm water to ensure clean, beautiful slices.
- Storage Suggestions: Store any leftovers in an airtight container in the refrigerator for up to three days—if it lasts that long!
- Ingredient Swaps: You can use Greek yogurt in place of cream cheese for a lighter twist without sacrificing flavor.
What’s Inside – Nutrition Breakdown
Each slice of this delightful Black Forest Icebox Cake offers a comforting blend of flavors, and here’s a quick look at the nutrition info per serving (1/12 of the cake):
- Calories: 250
- Carbohydrates: 30g
- Sugar: 20g
- Fat: 15g
- Protein: 3g
- Sodium: 150mg
Frequently Asked Questions
Can I make this ahead?
Absolutely! This cake is perfect for making a day in advance, as it allows the flavors to develop.
Can I use different ingredients?
Of course! Feel free to experiment by using different flavors of cookies or fruits.
How do I store leftovers?
Store leftovers in an airtight container in the refrigerator for up to three days.
How long does it last?
If stored properly, it can last for about three days, but trust me, it may not last that long!
A Cozy Closing Note
This Black Forest Icebox Cake is not just a dessert; it’s a delightful experience that brings back memories and creates new ones with every bite. Its creamy layers and rich flavors make it a true crowd-pleaser, perfect for all occasions. So go ahead, save this scrumptious treat to your dessert board so it’s ready when you need a cozy indulgence!
Here’s to many sweet moments shared around the table!
Print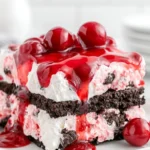
Black Forest Icebox Cake
- Total Time: 120 minutes
- Yield: 12 servings 1x
- Diet: Vegetarian
Description
A no-bake dessert that combines Chocolate Oreo cookies with a creamy cherry and cream cheese filling, perfect for any occasion.
Ingredients
- 24 Chocolate Oreo cookies
- 8 oz Cream cheese, softened
- 1 cup Cherries, pitted and chopped
- 2 cups Whipped cream
- 1/2 cup Sugar
- 1 teaspoon Vanilla extract
Instructions
- Mix the softened cream cheese with the sugar and vanilla extract until it’s smooth and creamy.
- Fold in the chopped cherries, blending beautifully with the cream cheese mixture.
- Layer the Chocolate Oreo cookies at the bottom of a large serving dish.
- Spread a layer of the cream cheese cherry mixture evenly over the cookies.
- Add a layer of whipped cream on top.
- Repeat the layers until reaching the top of your dish, finishing with whipped cream and extra cherries.
- Refrigerate for several hours or preferably overnight.
Notes
For best results, make a day in advance to allow flavors to develop. Store leftovers in an airtight container for up to three days.
- Prep Time: 20 minutes
- Cook Time: 0 minutes
- Category: Dessert
- Method: No-Bake
- Cuisine: American
Nutrition
- Serving Size: 1 slice
- Calories: 250
- Sugar: 20g
- Sodium: 150mg
- Fat: 15g
- Saturated Fat: 8g
- Unsaturated Fat: 5g
- Trans Fat: 0g
- Carbohydrates: 30g
- Fiber: 1g
- Protein: 3g
- Cholesterol: 30mg