A Cozy No-Churn Ice Cream Recipe
As the warmer days of summer stretch across the horizon, there’s nothing quite as comforting as a scoop of homemade ice cream. I still remember the afternoons spent with my grandmother, her kitchen filled with the sweet scent of vanilla and laughter as we churned out batch after batch of creamy delights. Now, let me share with you a no-fuss, no-churn recipe that captures all that nostalgia and warmth, turning your kitchen into a cozy sanctuary.
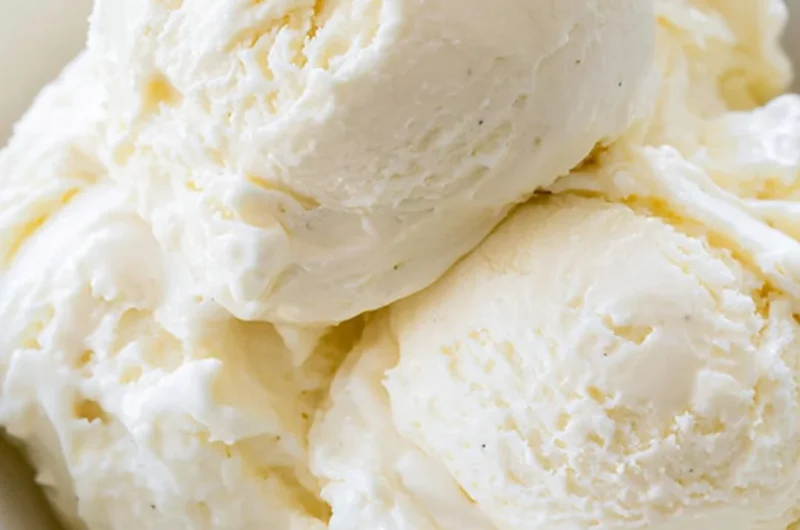
This No-Churn Ice Cream is not just easy—it’s silky, dreamy, and the perfect canvas for your favorite flavors. With just a handful of ingredients, you’ll create a treat that is undoubtedly satisfying. This is a perfect creamy summer dessert that you’ll want to pin for later!
Why You’ll Love This Recipe
- Quick and Easy: You only need about 15 minutes of hands-on time to whip this delightful treat up!
- No Ice Cream Maker Required: Say goodbye to complicated machinery—this no-churn method is as simple as it gets.
- Versatile Flavor Options: Luckily, this recipe serves as a base for endless creative variations, making it a family-friendly favorite.
- Perfect for Any Occasion: Whether it’s a summer BBQ or a cozy night in, this ice cream is ready for any celebration.
- Crowd-Pleasing Dessert: Homemade always wins over store-bought, and you can impress your friends and family with minimal effort!
What You’ll Need
Gather these simple ingredients to get started on your journey to homemade bliss:
- 2 cups heavy cream
- 1 can sweetened condensed milk
- 1 teaspoon vanilla extract
- Pinch of salt
How to Make No-Churn Ice Cream
Let’s turn your kitchen into an ice cream parlor:
In a large bowl, whip the heavy cream using an electric mixer until stiff peaks form. You want it to be thick and fluffy, much like whipped clouds!
In another bowl, combine the sweetened condensed milk, vanilla extract, and pinch of salt. Stir until well blended. The creamy mixture should have a lovely golden hue.
Gently fold the whipped cream into the condensed milk mixture. You want to keep that airy texture, so fold carefully like you’re cradling a delicate flower.
Pour the mixture into a loaf pan and smooth the top. You can even flick a little drizzle of vanilla extract on the surface for a sweet aroma.
Cover and freeze for at least 6 hours or until solid. Checking every now and then how it’s coming along can be quite a treat in itself!
Scoop and enjoy! Dive into your creamy creation—it’s your reward for the wait!
Delicious Variations to Try
Now that you have the base recipe down, let’s explore some fun twists:
Chocolate Swirl: Add melted chocolate or swirl in a rich fudge sauce for an indulgent treat. Imagine creamy chocolate flecks hugging each spoonful!
Fruity Bliss: Fold in pureed or diced fresh fruits like strawberries or mango for a zesty, refreshing experience that’s bursting with flavor.
Nutty Crunch: Include crunchy nuts like almonds or pecans for a delightful texture contrast—perhaps mixed in with caramel to create a rich, earthly delight.
Cookie Dough Delight: Chunks of cookie dough throughout the ice cream will surprise and delight everyone with every scoop!
Chef Emma’s Helpful Tips
Make-Ahead Magic: This ice cream can easily be made a day before you plan to serve it, ensuring you have a cozy treat ready to go.
Ingredient Swaps: Heavy cream can be substituted with coconut cream for a dairy-free version. Just make sure you check the consistency for sweetness!
Storage Suggestions: Keep your ice cream in an airtight container to preserve its texture. Avoid freezer burn by pressing plastic wrap directly onto the surface before sealing the container.
Nutrition Information per Serving
- Serving Size: 1 scoop (about 1/2 cup)
- Calories: 250
- Carbs: 27g
- Sugar: 24g
- Fat: 15g
- Protein: 3g
- Sodium: 80mg
Frequently Asked Questions
Can I make this ahead? Yes! This ice cream keeps well in the freezer for up to two weeks.
Can I use different ingredients? Absolutely! Feel free to experiment with different flavorings and mix-ins for your unique concoction.
How do I store leftovers? Store any leftover ice cream in an airtight container in the freezer to keep it fresh and creamy.
How long does it last? If stored properly, your no-churn ice cream can last up to two weeks in the freezer.
A Cozy Closing Note
This No-Churn Ice Cream isn’t just a recipe; it’s a way to share warmth, comfort, and sweetness with family and friends. With each scoop, you’ll savor the moments spent in the kitchen, just like I did with my grandmother. Make this recipe your own with delightful variations or enjoy it as is—the possibilities are endless! Save this No-Churn Ice Cream to your dessert board so it’s ready when you need a sweet and cozy treat!
No-Churn Ice Cream
- Total Time: 375 minutes
- Yield: 8 servings 1x
- Diet: Vegetarian
Description
A simple and comforting no-churn ice cream recipe that captures the nostalgic flavors of homemade desserts.
Ingredients
- 2 cups heavy cream
- 1 can sweetened condensed milk
- 1 teaspoon vanilla extract
- Pinch of salt
Instructions
- Whip the heavy cream using an electric mixer until stiff peaks form.
- Combine the sweetened condensed milk, vanilla extract, and pinch of salt in another bowl.
- Fold the whipped cream into the condensed milk mixture carefully.
- Pour the mixture into a loaf pan and smooth the top.
- Cover and freeze for at least 360 minutes or until solid.
- Scoop and enjoy your creamy creation!
Notes
This ice cream can be made a day in advance. It stores well in an airtight container for up to two weeks in the freezer.
- Prep Time: 15 minutes
- Cook Time: 0 minutes
- Category: Dessert
- Method: Freezing
- Cuisine: American
Nutrition
- Serving Size: 1 scoop (1/2 cup)
- Calories: 250
- Sugar: 24g
- Sodium: 80mg
- Fat: 15g
- Saturated Fat: 9g
- Unsaturated Fat: 6g
- Trans Fat: 0g
- Carbohydrates: 27g
- Fiber: 0g
- Protein: 3g
- Cholesterol: 40mg